Seamless Integration: Assembling Your AR-15 Upper and Lower
How to Assemble an AR-15 Upper to Lower: Top Guide 2024
Seamless Integration: Assembling Your AR-15 Upper and Lower
How to assemble an AR-15 upper to lower is one of the most common questions among firearm enthusiasts looking to customize or build their own rifle. It’s a straightforward process but requires careful attention to detail.
Here’s a quick answer if you’re in a hurry:
- Align the front pivot pin bosses of the upper and lower receivers.
- Insert the pivot pin to secure them.
- Add an accurizing wedge for a tighter fit.
- Insert the charging handle and bolt assembly.
- Pivot the upper assembly back and secure it with some pressure.
Assembling an AR-15 upper to lower is not only a valuable skill but also offers the flexibility to customize your rifle to your liking. Whether you’re a seasoned builder or a beginner, following the right steps ensures a seamless integration for optimal performance.
Safety is paramount during this process. Always ensure the rifle is unloaded before you start work. Additionally, wearing safety glasses can protect your eyes from small parts or springs that may come loose.
Building your own AR-15 can be incredibly rewarding and offers the satisfaction of knowing every component inside your firearm. Understanding the significance of each part and how it fits together will not only enhance your competency but also deepen your appreciation for the craftsmanship involved.

Understanding the Components of Your AR-15
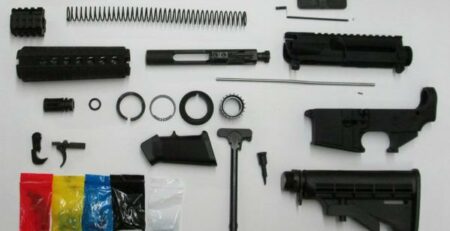
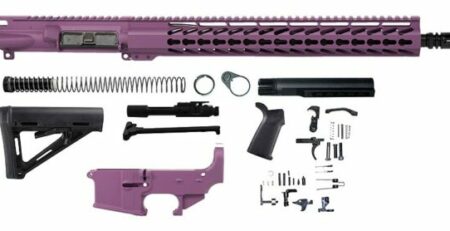
Before diving into how to assemble an AR-15 upper to lower, it’s crucial to understand the main components that make up this versatile rifle. The AR-15 is primarily divided into two main sections: the upper receiver and the lower receiver. Each section houses several essential parts that work together to ensure the rifle functions correctly.
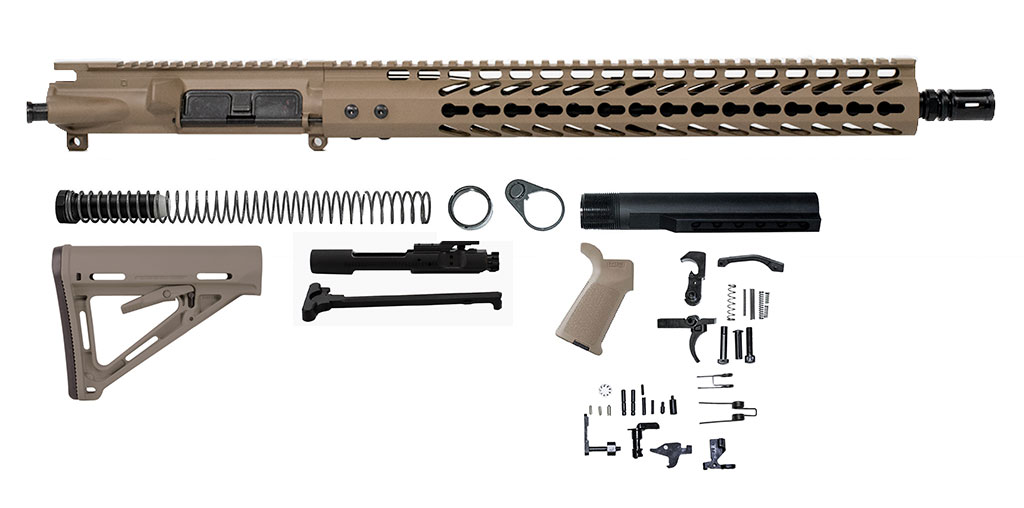
What Makes Up the AR-15 Upper Receiver?
The upper receiver includes several key components:
-
Barrel: This is where the bullet travels when fired. AR-15 barrels come in various lengths and materials, such as 4140 Chromoly, 4150 Chromoly Vanadium (CMV), and 416R stainless steel. The choice of barrel can affect the rifle’s performance and accuracy.
-
Muzzle Devices: These are attached to the end of the barrel and serve various purposes. Common devices include flash hiders, which reduce the visible signature of the shot, and muzzle brakes, which help manage recoil.
-
Bolt Carrier Group (BCG): This is the heart of the upper receiver. It includes the bolt, carrier, gas key, and firing pin. The BCG is responsible for chambering a round, firing it, and ejecting the spent cartridge.
-
Gas System: This system uses gas from the fired cartridge to cycle the action. It includes the gas block and gas tube. Different lengths (carbine, mid-length, rifle) are used depending on the barrel length.
-
Charging Handle: This allows the shooter to manually cycle the action, chamber a round, or clear malfunctions. It is located at the rear of the upper receiver.
-
Rails: These are used to attach accessories like optics, lights, and foregrips. The most common types are Picatinny, M-LOK, and KeyMod.
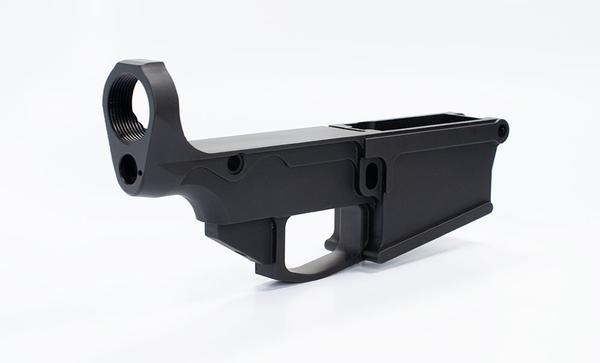
What Parts are Found in the AR-15 Lower Receiver?
The lower receiver houses the fire control components and provides the base for the rifle’s stock and grip:
-
Fire Control Group: This includes the trigger, hammer, disconnector, and safety selector. Upgraded triggers can improve accuracy and shooting comfort.
-
Magazine Well: This is where the magazine is inserted. It must be compatible with the caliber and type of ammunition you plan to use.
-
Pistol Grip: Attached to the lower receiver, the pistol grip provides a comfortable and stable hold on the rifle. Various styles and materials are available to suit different preferences.
-
Forged vs. Billet: Lower receivers can be made from forged or billet aluminum. Forged receivers are generally stronger and lighter, while billet receivers are machined from a solid block of aluminum, offering more customization options.
Understanding these components is essential for assembling your AR-15. Each part plays a specific role in the rifle’s operation, and knowing how they interact will make the assembly process smoother and more efficient.
Next, we will dive into the step-by-step guide on how to assemble an AR-15 upper to lower.
How to Assemble an AR-15 Upper to Lower
Preparing the Upper Receiver
Step-by-Step Guide:
- Install the Barrel: Start by inserting the barrel into the upper receiver. Ensure it is seated properly in the barrel extension.
- Torque the Barrel Nut: Use a torque wrench to tighten the barrel nut to the manufacturer’s specified torque. This ensures a secure fit and proper alignment.
- Attach the Gas Tube: Insert the gas tube through the barrel nut and into the gas block. Secure the gas block in place, ensuring it aligns correctly with the gas port on the barrel.
Tools Needed:
– Torque wrench
– Barrel nut wrench
– Gas tube roll pin punch
Safety Checks:
– Always ensure the rifle is unloaded before starting any assembly.
– Use proper torque settings to avoid damaging components.
Preparing the Lower Receiver
Step-by-Step Guide:
- Install Fire Control Group: Begin by placing the trigger and hammer into the lower receiver. Secure them with the appropriate pins.
- Attach the Pistol Grip: Align the pistol grip with the lower receiver and secure it using the provided screw. Ensure the grip is tight but not over-tightened.
Tools Needed:
– Roll pin punch set
– Hex key or screwdriver for the pistol grip screw
Safety Checks:
– Double-check that all pins are fully seated and secure.
– Ensure the trigger moves freely and engages correctly.
By following these steps, you can efficiently prepare both the upper and lower receivers for assembly. In the next section, we will discuss how to ensure compatibility and fit between the upper and lower receivers.
Ensuring Compatibility and Fit Between Upper and Lower
How to Check for Proper Fit
When assembling your AR-15, ensuring compatibility and fit between the upper and lower receivers is crucial. Here’s a simple guide on how to assemble an AR-15 upper to lower and ensure everything fits perfectly.
Compatibility
First, you need to ensure that your upper and lower receivers are compatible. While most AR-15 parts are designed to be interchangeable, it’s always best to use components from the same manufacturer to avoid any fitment issues.
“In theory, most AR-15 uppers will fit on a standard AR-15 lower. Pick the same brand upper and lower for the best results.” — Reddit User
Fit Testing
Once you have your compatible upper and lower receivers, it’s time to test the fit:
- Align the Receivers:
- Start by aligning the front pivot pin bosses of the upper and lower receivers.
-
Make sure the hammer is cocked and the safety is on.
-
Insert the Pivot Pin:
-
Push the pivot pin through the aligned holes to secure the front of the receivers.
-
Check the Rear Takedown Pin:
- Pivot the upper receiver down and push the rear takedown pin to secure it.
Troubleshooting Common Issues
If you encounter any issues during fit testing, here are some common problems and solutions:
- Tight Fit: Some new parts may require a bit of persuasion to fit together. A small rubber mallet can help nudge the parts into place without causing damage.
- Misalignment: Ensure that both receivers are perfectly aligned before attempting to insert the pins. Misalignment can cause the pins to stick or not go through at all.
- Loose Fit: If the receivers have a bit of wobble, consider using an accurizing wedge. This small piece of rubber fits between the upper and lower receivers, tightening the fit.
Alignment
Proper alignment is key to a well-functioning AR-15. Here’s how to ensure everything is aligned correctly:
- Visual Inspection: Once both pins are in place, visually inspect the receivers to ensure they are flush with each other. There should be no visible gaps.
- Hand Pressure: Apply hand pressure to both the front and rear of the upper receiver while it’s pivoted down. This ensures the receivers are seated properly.
Function Test
After ensuring proper alignment, perform a function test:
- Cycle the Charging Handle:
- Insert the charging handle and bolt assembly.
-
Pull the charging handle to check for smooth operation.
-
Dry Fire Test:
- Ensure the firearm is unloaded.
-
Test the trigger pull to ensure the hammer drops correctly.
-
Safety Check:
- Engage and disengage the safety to ensure it works properly.

By following these steps, you can ensure a seamless fit between your AR-15 upper and lower receivers. This will not only make your firearm more reliable but also enhance its overall performance.
In the next section, we will answer some frequently asked questions about assembling AR-15 uppers and lowers.
Frequently Asked Questions about Assembling AR-15 Uppers and Lowers
Can You Mix AR-15 Uppers and Lowers from Different Manufacturers?
Yes, you can mix AR-15 uppers and lowers from different manufacturers. Most AR-15 components are designed to be compatible with each other, as long as they adhere to the Mil-Spec (military specification) standards. This means that the dimensions and tolerances are generally the same across different brands. However, for the best fit and finish, some enthusiasts prefer to use the same brand for both the upper and lower receivers.
One user shared their experience on Reddit, mentioning that their Aero upper required some persuasion to fit on a Rock Hill lower. Over time, the fit improved, demonstrating that some initial tightness can be normal and will settle with use.
Do All AR-15 Uppers Fit All AR-15 Lowers?
While most AR-15 uppers will fit on a standard AR-15 lower, there can be some variations. Mil-Spec standards ensure a high degree of compatibility, but there are exceptions. Some manufacturers produce proprietary designs that may not fit perfectly with parts from other brands.
For instance, if you’re using a non-Mil-Spec lower receiver, you may encounter fitment issues. It’s always a good idea to check for compatibility before making a purchase. Local gun shops often allow you to test fit parts before buying, which can save you from potential headaches down the road.
What Caliber Uppers Fit a 5.56 Lower?
The beauty of the AR-15 platform is its versatility. A 5.56 lower receiver can accommodate a variety of caliber uppers with the right modifications. Here are some popular options:
- .223 Remington: Directly compatible with 5.56 lowers.
- .300 Blackout: Requires only a barrel change; the same bolt carrier group (BCG) and magazines can be used.
- 6.5 Grendel: Needs a different BCG and magazines.
- .458 SOCOM: Requires a new BCG and specific magazines.
For those looking to switch calibers frequently, conversion kits are available. These kits include everything you need to change calibers easily, from the barrel to the BCG and magazines. Always ensure that your lower receiver and buffer system are compatible with the new caliber to avoid malfunctions.
By understanding these compatibility and fit issues, you can confidently mix and match AR-15 components to create a firearm tailored to your needs.
Conclusion
In this guide, we’ve walked you through the essentials of how to assemble an AR-15 upper to lower. From understanding the components to ensuring proper fit and compatibility, you now have the knowledge to create a reliable and efficient firearm.
Review
Assembling an AR-15 involves several key steps:
- Preparing the Upper Receiver: Install the barrel, torque the barrel nut, and attach the gas tube.
- Preparing the Lower Receiver: Install the fire control group and attach the pistol grip.
- Joining Upper and Lower: Align the pivot pin bosses, push in the pivot pin, and secure the takedown pin.
These steps are straightforward, but attention to detail is critical. Ensuring each component is correctly installed and fits properly will result in a more reliable and accurate rifle.
Maintenance Tips
Maintaining your AR-15 is crucial for its longevity and performance. Here are some tips:
- Regular Cleaning: Clean your firearm after each use. This prevents residue build-up that can affect performance.
- Lubrication: Apply a light coat of lubricant to moving parts to reduce wear and tear.
- Inspection: Regularly inspect your firearm for any signs of damage or wear. Replace worn-out parts promptly.
- Proper Storage: Store your AR-15 in a cool, dry place to prevent rust and corrosion.
For a more detailed guide on maintaining your AR-15, check out our Brief Guide to AR-15 Rifle Cleaning.
Daytona Tactical
At Daytona Tactical, we’re passionate about providing high-quality AR-15 parts and assemblies. Whether you’re a seasoned builder or a first-time assembler, we have the components and expertise to help you create your ideal firearm.
Explore our extensive range of AR-15 upper build assemblies to find the perfect fit for your next project.
Thank you for choosing Daytona Tactical. Happy building!