A Guide to Completing an 80% AR-15 Lower Receiver and Building an AR-15 at Home
A Guide to Completing an 80% AR-15 Lower Receiver and Building an AR-15 at Home
Introduction: Building your AR-15 from scratch can be a rewarding experience for gun enthusiasts and those looking to customize their firearms. In this blog, we will guide you through completing an 80% AR-15 lower receiver and provide tips on efficiently assembling an AR-15 at home.
Part 1: Completing an 80% AR-15 Lower Receiver
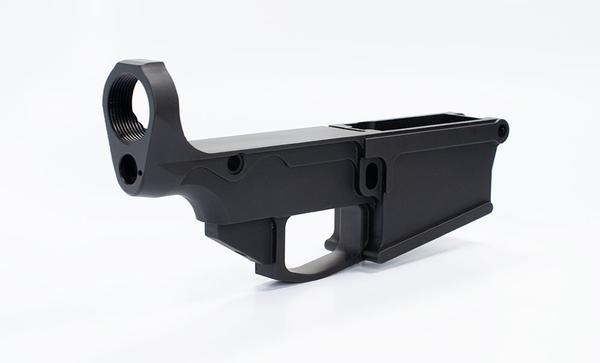
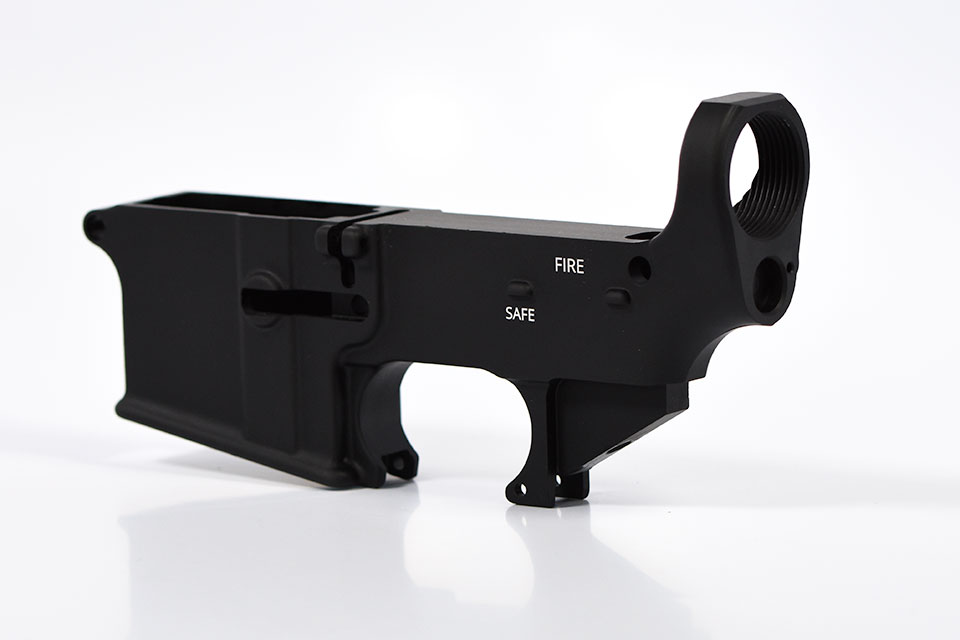
- Understanding the 80% Lower Receiver:
- The ATF does not consider an 80% lower receiver a firearm until it is fully machined.
- It requires some machining and drilling to complete, but it allows you to legally build your gun.
- Essential Tools and Equipment:
- Milling machine or drill press
- Drill bits and end mills
- Vise and clamps
- Safety glasses and gloves
- Measuring tools (calipers, rulers, etc.)
- Step-by-Step Process:
- Read and understand the instructions provided by the manufacturer.
- Securely mount the 80% lower receiver in a vise.
- Use a milling machine or drill press to remove excess material following the manufacturer’s guidelines.
- Drill necessary holes for the trigger assembly, safety selector, and other components.
- Use a finishing end mill to complete the trigger pocket and other areas requiring additional machining.
- Thoroughly clean and inspect the finished lower receiver.
Part 2: Building an AR-15 at Home
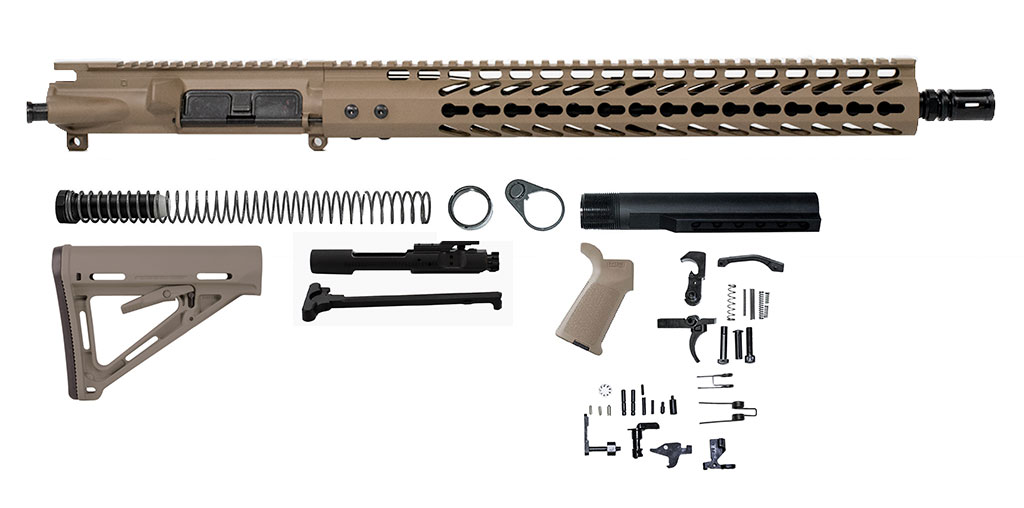
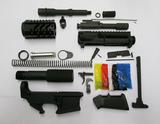
- Gather the Required Components:
- AR-15 upper receiver
- Barrel
- Bolt carrier group
- Charging handle
- Handguard
- Gas system (if applicable)
- Lower parts kit
- Buffer tube assembly
- Stock or brace
- Sights or optics
- Organize and Prepare:
- Lay out all the components and ensure you have everything needed.
- Clean and inspect each part for any defects or damage.
- Use appropriate lubrication on moving parts.
- Assembly Process:
- Attach the lower receiver to the upper receiver using the takedown pins.
- Install the bolt carrier group, charging handle, and handguard.
- Install the barrel, gas system, and muzzle device (if applicable).
- Install the lower parts kit, ensuring proper function of the trigger, safety selector, and magazine release.
- Attach the buffer tube assembly and stock or brace.
- Install sights or optics and ensure they are correctly zeroed.
Tips for Efficient Building:
- Plan Ahead:
- Familiarize yourself with the instructions and process before starting.
- Create a checklist of all required components and tools to avoid unnecessary delays.
- Take Your Time:
- Building an AR-15 requires precision and attention to detail.
- Rushing may lead to mistakes that could affect the functionality and safety of the firearm.
- Seek Assistance When Needed:
- Contact online communities, forums, or local gun stores for guidance and advice.
- Feel free to ask for help if you encounter any difficulties.
Conclusion: Completing an 80% AR-15 lower receiver and building an AR-15 at home is a challenging yet rewarding endeavor. By following the step-by-step process, utilizing the right tools, and taking your time, you can successfully assemble a custom AR-15 that suits your needs and preferences. Remember to prioritize safety throughout the process and enjoy the satisfaction of creating your firearm.
This is not an FFL Item because 80% Stripped Lower Receivers not fully Machined and needs Machining to complete lower receiver.
WARNING: The links to products in this post may contains chemicals known to the State of California to cause cancer and birth defects or other reproductive harm. For more information: www.P65Warnings.ca.gov